Outdoor LED display screens are a significant investment, whether used for advertising, live events, public information, or retail environments. With capital-intensive hardware and high operational demands, ensuring optimal performance and longevity requires a comprehensive maintenance plan. Proper care prevents issues such as pixel failures, color inconsistency, brightness decay, power supply faults, and signal interruptions. This guide provides a detailed, professional approach for maintaining outdoor LED display screens, incorporating industry standards such as IEC 60529 (IP rating for water and dust resistance), IEEE surge protection guidelines, and SJ/T 11141-2017 (LED display performance standards).
1. Environmental Considerations
Maintaining a controlled environment around an outdoor LED screen is the first step in preventing premature failure. Environmental stressors such as high temperature, humidity, dust, UV exposure, and mechanical impact can significantly reduce the screen’s lifespan.
1.1 Operating Temperature and Humidity
- Recommended temperature range: -20°C ≤ T ≤ 50°C.
- Recommended humidity range: 10%–90% RH.
- Avoid exposure to extreme heat, humidity, acidic or alkaline environments, and saltwater locations.
- For screens exposed to high temperature or poor ventilation conditions, limit continuous runtime to prevent thermal stress on LED modules and power supplies.
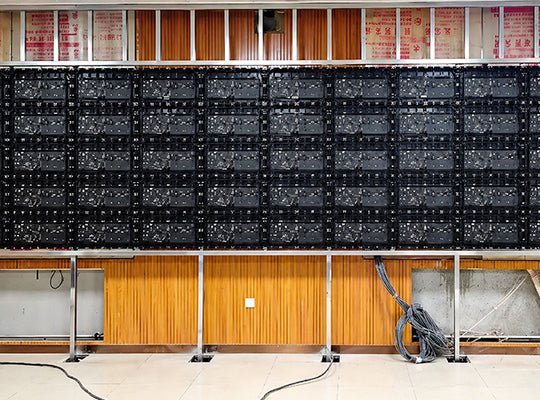
1.2 Dust, Debris, and Foreign Materials
- Place screens in low-dust environments whenever possible. Excessive dust can reduce brightness and damage internal circuitry.
- Prevent conductive materials such as iron particles, water, or liquids from entering the cabinet. If water ingress occurs, immediately disconnect power and ensure components are fully dry before reactivation.
- Avoid placing plants, aquariums, or other sources of humidity near the screen.
1.3 Transportation and Handling
- Prevent strong impacts and collisions during transport. Use soft padding and protective coverings.
- Avoid contact with sharp objects that could puncture the cabinet or damage LED modules.
2. Power-On and Power-Off Procedures
Proper power management protects the internal electronics, prevents overcurrent damage, and ensures stable system startup and shutdown.
2.1 Startup Sequence
- Power on the control computer first, ensuring that the software and display settings are fully operational.
- Power on the LED screen after the control system is ready.
- Avoid powering the screen with a full-white or full-blue test pattern immediately, as this generates maximum current draw and stresses the PSU and driver ICs.
2.2 Shutdown Sequence
- Turn off the LED screen first, followed by the control computer.
- Maintain a minimum interval of 5 minutes between repeated power cycles to protect driver boards and LEDs.
- For screens that have been idle for extended periods, use preheating protocols: gradually increase brightness to 30–50% for 4–8 hours (if idle 3–7 days) or 12 hours (if idle >7 days) before reaching full operational brightness.
2.3 Power Supply Guidelines
- LED modules require DC 5V power (operating voltage 4.2–5.2V). AC supply is strictly prohibited.
- Check that polarity is correct to prevent module burnout or fire hazards.
- Ensure reliable grounding and keep LED power lines separate from high-load equipment.
- Monitor PSU load: keep below 85% of rated capacity per IEEE recommendations.
- During thunderstorms, disconnect screens if surge protection or grounding is insufficient.
3. Cleaning and Surface Maintenance
3.1 Daily and Periodic Cleaning
- Use soft microfiber cloths, soft brushes, or ionized air blowers.

- Avoid abrasive cloths, paper towels, or hard pressure that can damage LEDs or coatings.
- Cleaning fluids should be neutral, non-corrosive, applied to cloths rather than sprayed directly. Alcohol or ammonia-based solutions should be avoided.
- For COB/GOB protective LED screens, avoid any direct contact with the module surface to protect delicate coatings.
3.2 Dust and Debris Prevention
- Install filters or covers on ventilation openings.
- Perform routine inspection of air intake and exhaust channels, especially in sandy or dusty environments.
- Use a vacuum cleaner with a soft brush for vent cleaning and compressed air for hard-to-reach areas.
4. Periodic System and Performance Checks
4.1 Pixel and Brightness Checks
- Detect dead, dim, or flickering pixels monthly.
- Perform brightness and chroma recalibration every 6 months to maintain ≥95% uniformity per SJ/T 11141-2017.
- Verify gray-scale levels and refresh rates. For high-resolution indoor/outdoor screens, ensure the system supports 14–16 bit grayscale for smooth video playback.

4.2 Driver IC and Signal Chain Monitoring
- Test driver IC operating voltage, temperature, and PWM output for abnormalities.
- Inspect data transmission integrity: verify cabling, connectors, and optical fibers.
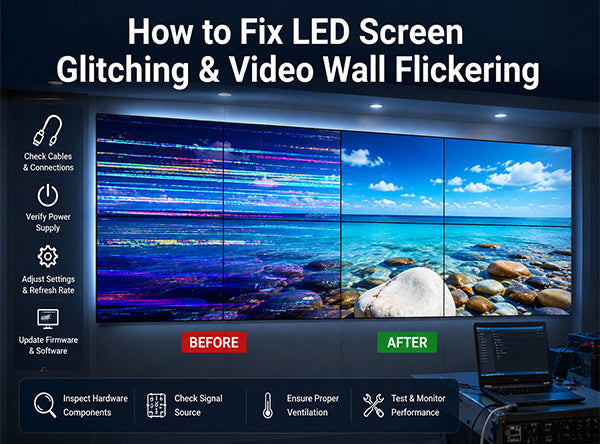
- For large video walls, check clock synchronization across multiple modules to avoid tearing or flicker.
4.3 Power System Inspections
- Perform quarterly PSU load balancing and measure voltage and current for each module.
- Inspect for thermal hotspots, oxidation, and connector loosening.
- Ensure redundancy systems (dual PSU, dual control cards) are functional.
5. Outdoor-Specific Maintenance Considerations
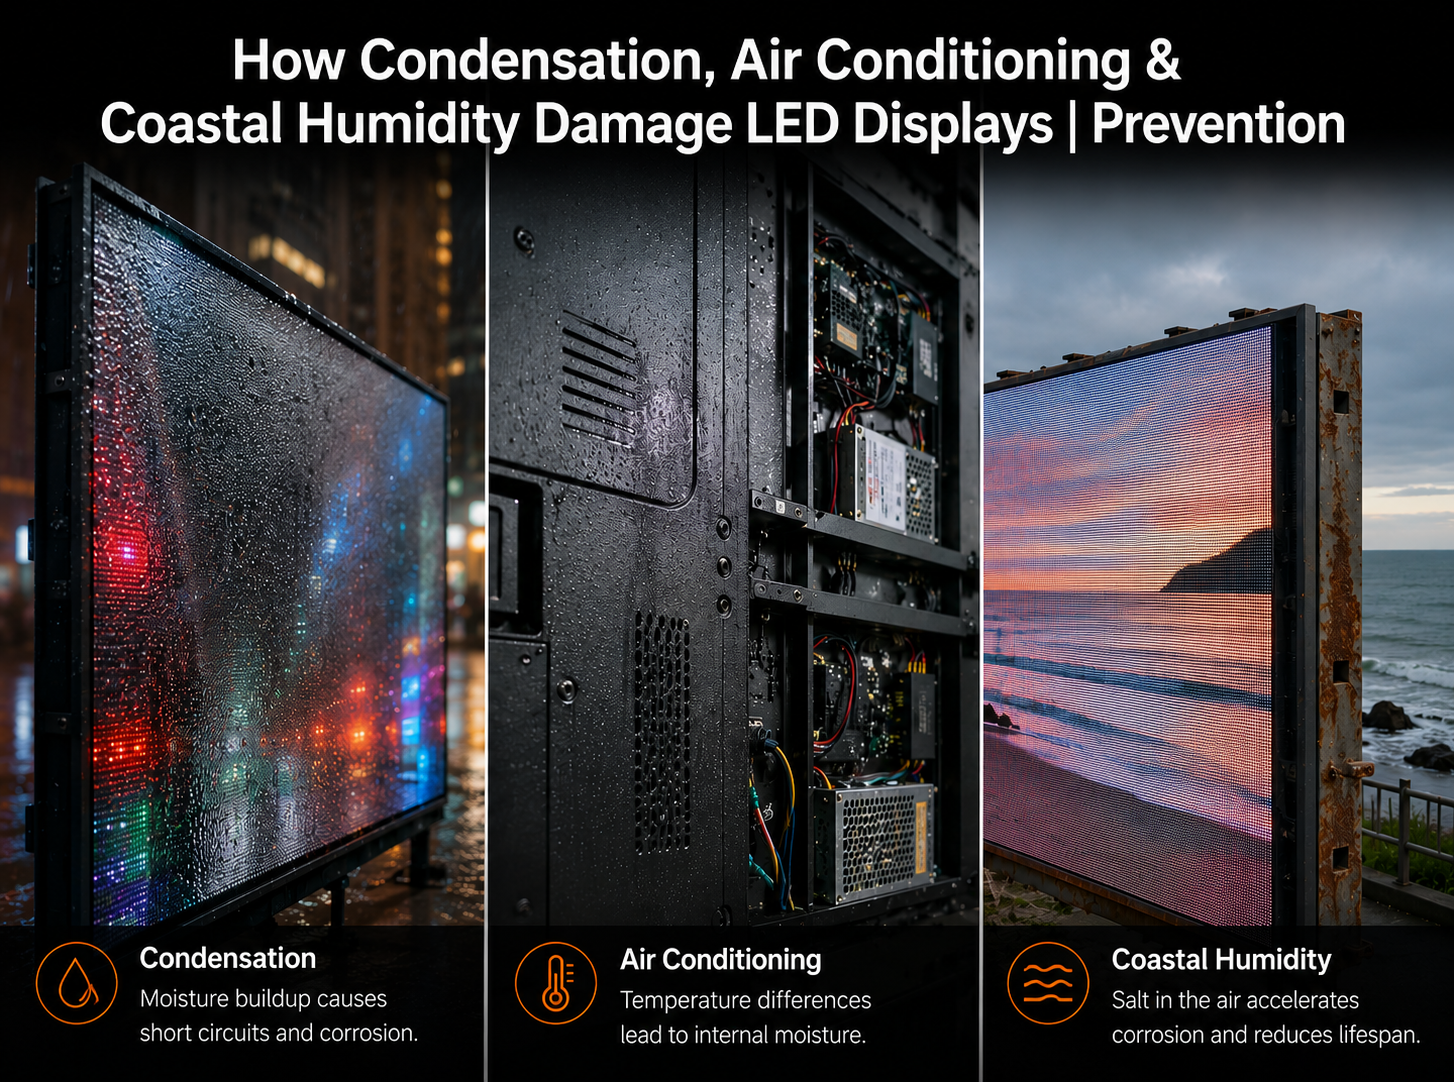
5.1 Weatherproofing and Moisture Protection
- Inspect gaskets, seals, and waterproof connectors.
- Check drainage paths for rainwater and condensation.
- Moisture ingress can corrode PCBs and cause short circuits. Immediate shutdown is required if water enters the cabinet.

5.2 Thermal Management
- Outdoor screens generate significant heat.
- Ensure adequate airflow, clean fan filters, and verify HVAC or forced-air cooling systems.
- Thermal stress accelerates LED aging by ~10% per 10°C temperature rise.
5.3 Surge and Lightning Protection
- Implement dual-layer surge protection on both power and signal lines.
- Grounding systems should maintain <10Ω resistance.
- Install lightning rods where regulations permit, ensuring proper grounding.
5.4 Structural Integrity
- Check mounting brackets, fasteners, and support frames for corrosion, loosening, or deformation.
- Validate screen wind-load capacity.
- Inspect for mechanical fatigue annually, especially for tall or exposed structures.
6. Advanced Technical Maintenance
6.1 Gray-Scale Calibration
- Utilize calibration instruments to adjust LED brightness across modules for uniform visual output.
- Perform module-level gray-scale calibration during installation and every 6–12 months.

6.2 Driver IC Health Checks
- Monitor PWM signals, temperature, and power consumption of each driver IC.
- Detect and replace failing ICs before they cause cascading pixel failures.
6.3 Signal Chain Troubleshooting
- Inspect video processor output, switchers, and cabling integrity.
- Verify signal timing, clock distribution, and fiber optic link performance.
- Use diagnostic software to identify latency, flicker, or color deviation issues.
6.4 Predictive and Smart Maintenance
- Employ IoT monitoring systems for real-time temperature, humidity, and voltage data.
- Set automated alarms for abnormal operating conditions.
- Analyze historical operational data for predictive maintenance, reducing emergency service events by 40–60%.
7. Operational Safety and Staff Protocols
- Only trained personnel should access the screen’s internal circuitry.
- High-voltage sections must be clearly labeled.
- Use proper personal protective equipment (PPE) when working on mounted screens.
- Pre-install safety checks for live event applications, including fall-prevention measures and emergency shutdown protocols.
8. Seasonal and Event-Based Maintenance
- Rainy or humid seasons: Check seals, gaskets, and activate internal dehumidifiers.
- Dusty/sand-prone environments: Increase filter cleaning frequency and optical surface inspection.
- High-brightness usage or pre-event operation: Full calibration, PSU load check, and redundancy verification.
- Post-event or extended operation: Conduct thermal cycling tests and firmware refresh.
9. Common Mistakes to Avoid
| Mistake | Technical Risk |
|---|---|
| Continuous display of full-brightness white/blue content | Thermal stress, PSU overload, LED damage |
| Ignoring flickering or minor pixel issues | Driver IC or module degradation |
| Cleaning with abrasive materials or harsh chemicals | Surface coating damage, image quality loss |
| Poor ventilation or clogged filters | Overheating, reduced module lifespan, PSU burnout |
Avoid prolonged full-luminance playback; favor dynamic video content to distribute load evenly across LEDs.
10. Summary
A well-maintained outdoor LED display ensures:
- Extended operational lifespan
- Stable, high-quality visual output
- Reduced risk of unexpected failure
- Optimized ROI and lower operational costs
By combining daily care, periodic inspections, advanced technical checks, and smart monitoring, operators can achieve professional-grade reliability and longevity. Adhering to IEC, IEEE, and SJ/T 11141-2017 standards ensures industry compliance, safety, and optimal performance.
Proper maintenance is not optional—it is a critical investment in protecting your assets, ensuring audience satisfaction, and avoiding costly emergency repairs.


Share:
VMX VNT (Venus-Touring Series): The Next Generation of Carbon Fiber LED Rental Systems
Giving Thanks for Every Pixel: A Thanksgiving Message from VMX Visual